Installing True Range Research on TradeStation
Two files, a license key, and one step people skip. Takes a few minutes, and only needs doing once.
Don’t have TradeStation yet? True Range Research runs on TradeStation. You need a TradeStation account and platform access to use it.
For questions about opening an account, platform features, or TradeStation fees, contact Peter Albino at TradeStation.
Phone: 312.803.3860 or 888.735.1222
Email: PAlbino@TradeStation.com
TradeStation is a separate company and does not provide, review, or endorse True Range Research. True Range Research receives no compensation for accounts opened through this link. Questions about True Range Research indicators, licenses, or installation go to support@truerangeresearch.com.
Three things need to be in place before you start:
- The TradeStation desktop platform. TradeStation lists it as Desktop, with a Pro option. Importing studies and opening workspaces are desktop features.
- The right accounts for the product you bought. Every product charts its symbol alongside a matching ETF, so the platform needs data for both sides. Equity products chart a stock alongside an ETF, so an equity account covers them. Futures products chart a futures contract alongside an ETF, so those need a futures account and an equity account. A simulated account is enough to install everything and watch the charts work.
- Your license key. Fifteen digits, in your confirmation email.
Your installation package contains two files:
- The TRR Signal Engine — an
.ELDfile - The TRR Workspace — a
.TSWfile
Save both somewhere you will be able to find them again. A dedicated folder is worth the ten seconds — you will want these files, and the key, if you ever move machines or reinstall TradeStation. Install in order: the workspace looks for studies that the Signal Engine puts in place.
Step 1 — Import the Signal Engine
Open the TradeStation desktop platform, then:
-
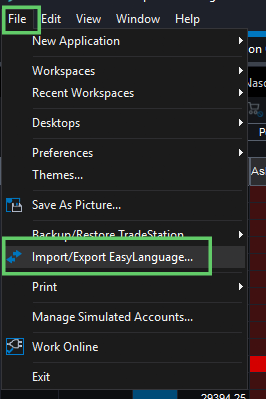
Select File → Import/Export EasyLanguage…
-
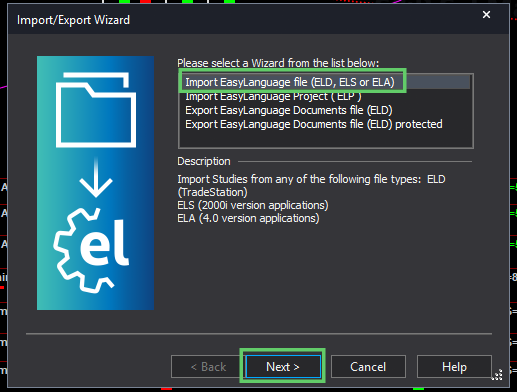
Choose Import EasyLanguage File (ELD, ELS, or ELA) and click Next. It is the first option in the list, and usually already selected.
-
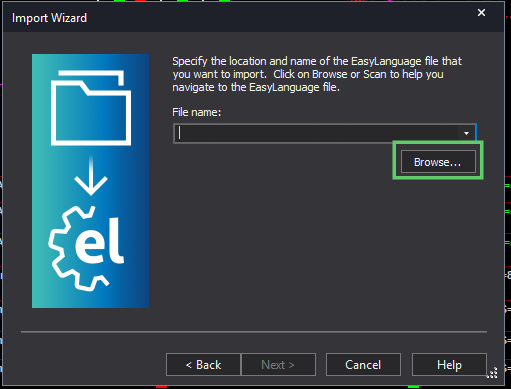
Click Browse.
-
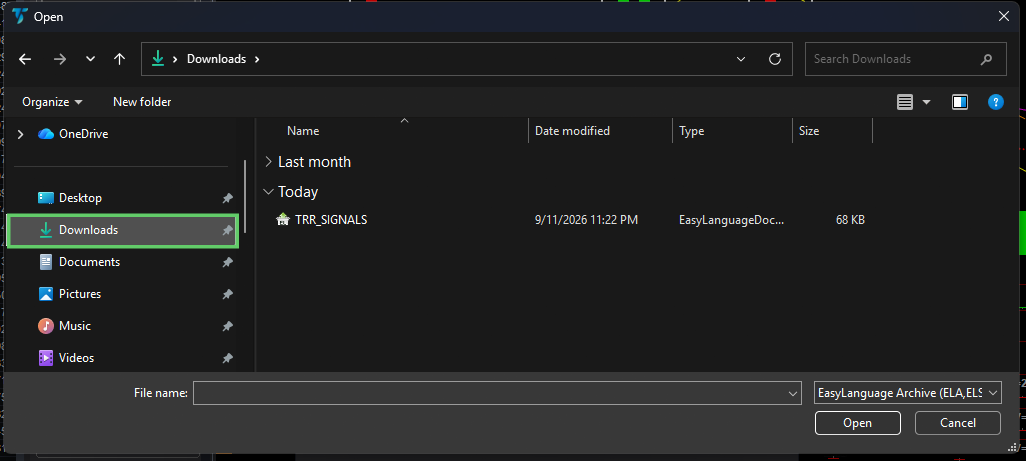
Go to the folder where you saved the file, usually Downloads.
-
Select the
.ELDfile and click Open.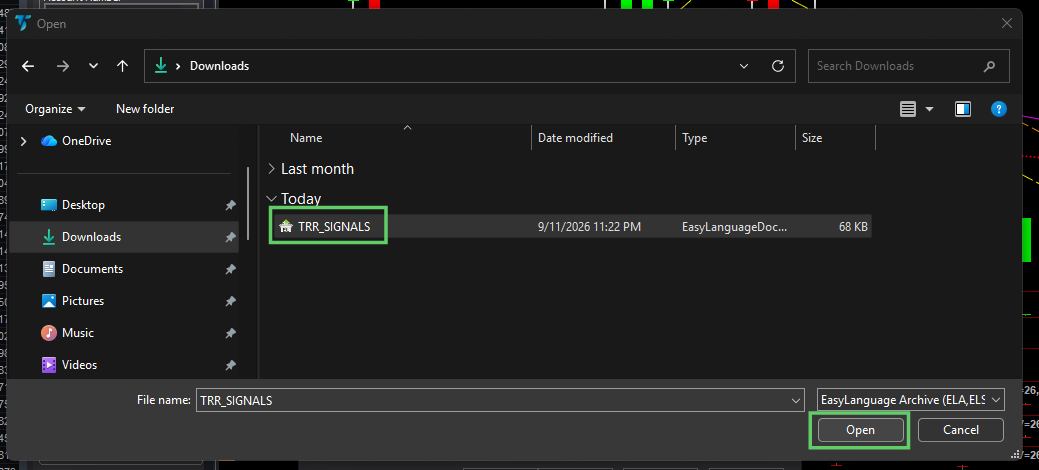
-
Check that the path is right, then click Next.
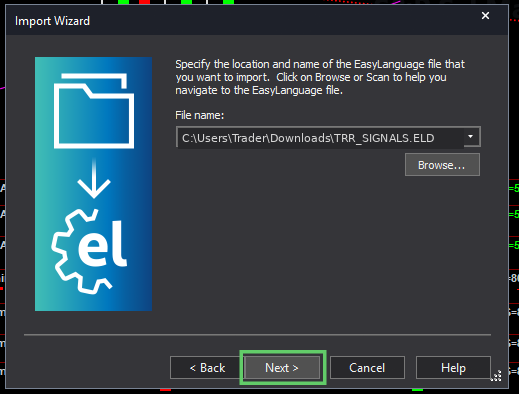
-
On the categories screen, leave both study types checked and click Next. Functions and strategies are both required.
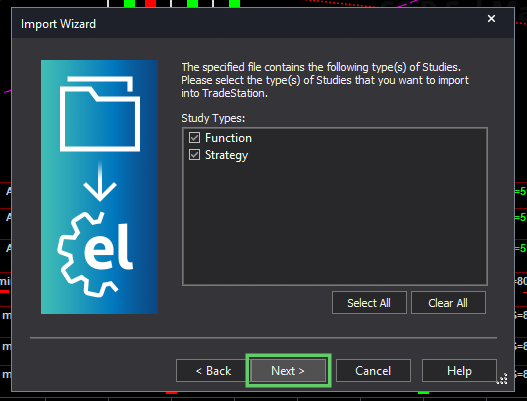
-
On the studies screen, click Select All, then Finish.
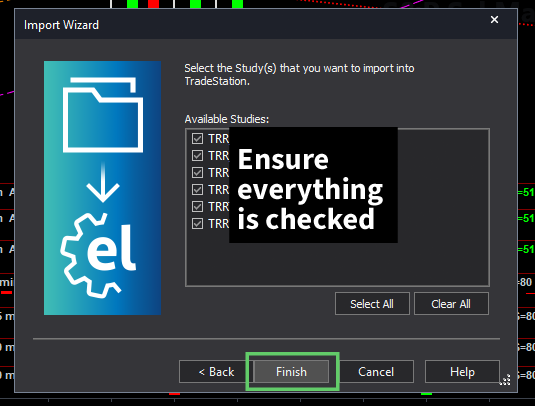
-
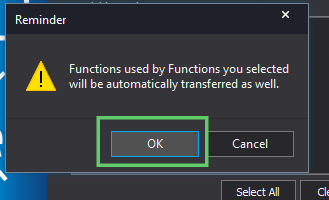
Click OK at the reminder about functions.
-
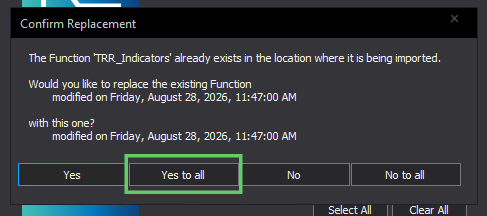
If you are asked to replace existing files, click Yes to all. This appears when a previous version is already installed — on an update or a reinstall. On a first install you will not see it.
-
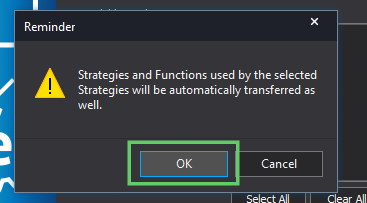
Click OK at the reminder about strategies. The import is done when this dialog closes.
Read any warnings rather than clicking past them. TradeStation will occasionally flag that an import affects existing custom studies. This is uncommon, but if you have your own EasyLanguage work in the platform, that message is worth reading before you continue.
Step 2 — Open the workspace
-
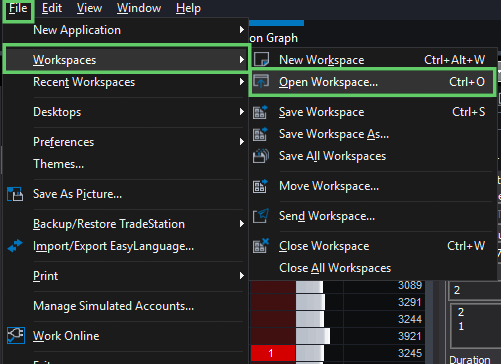
Select File → Workspaces → Open Workspace…
-
Navigate to where you saved the
.TSWfile, select it and click Open.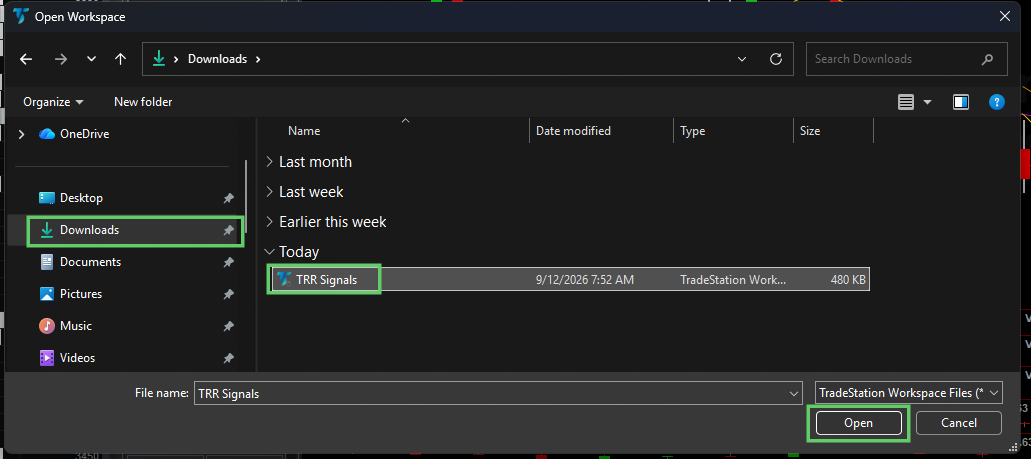
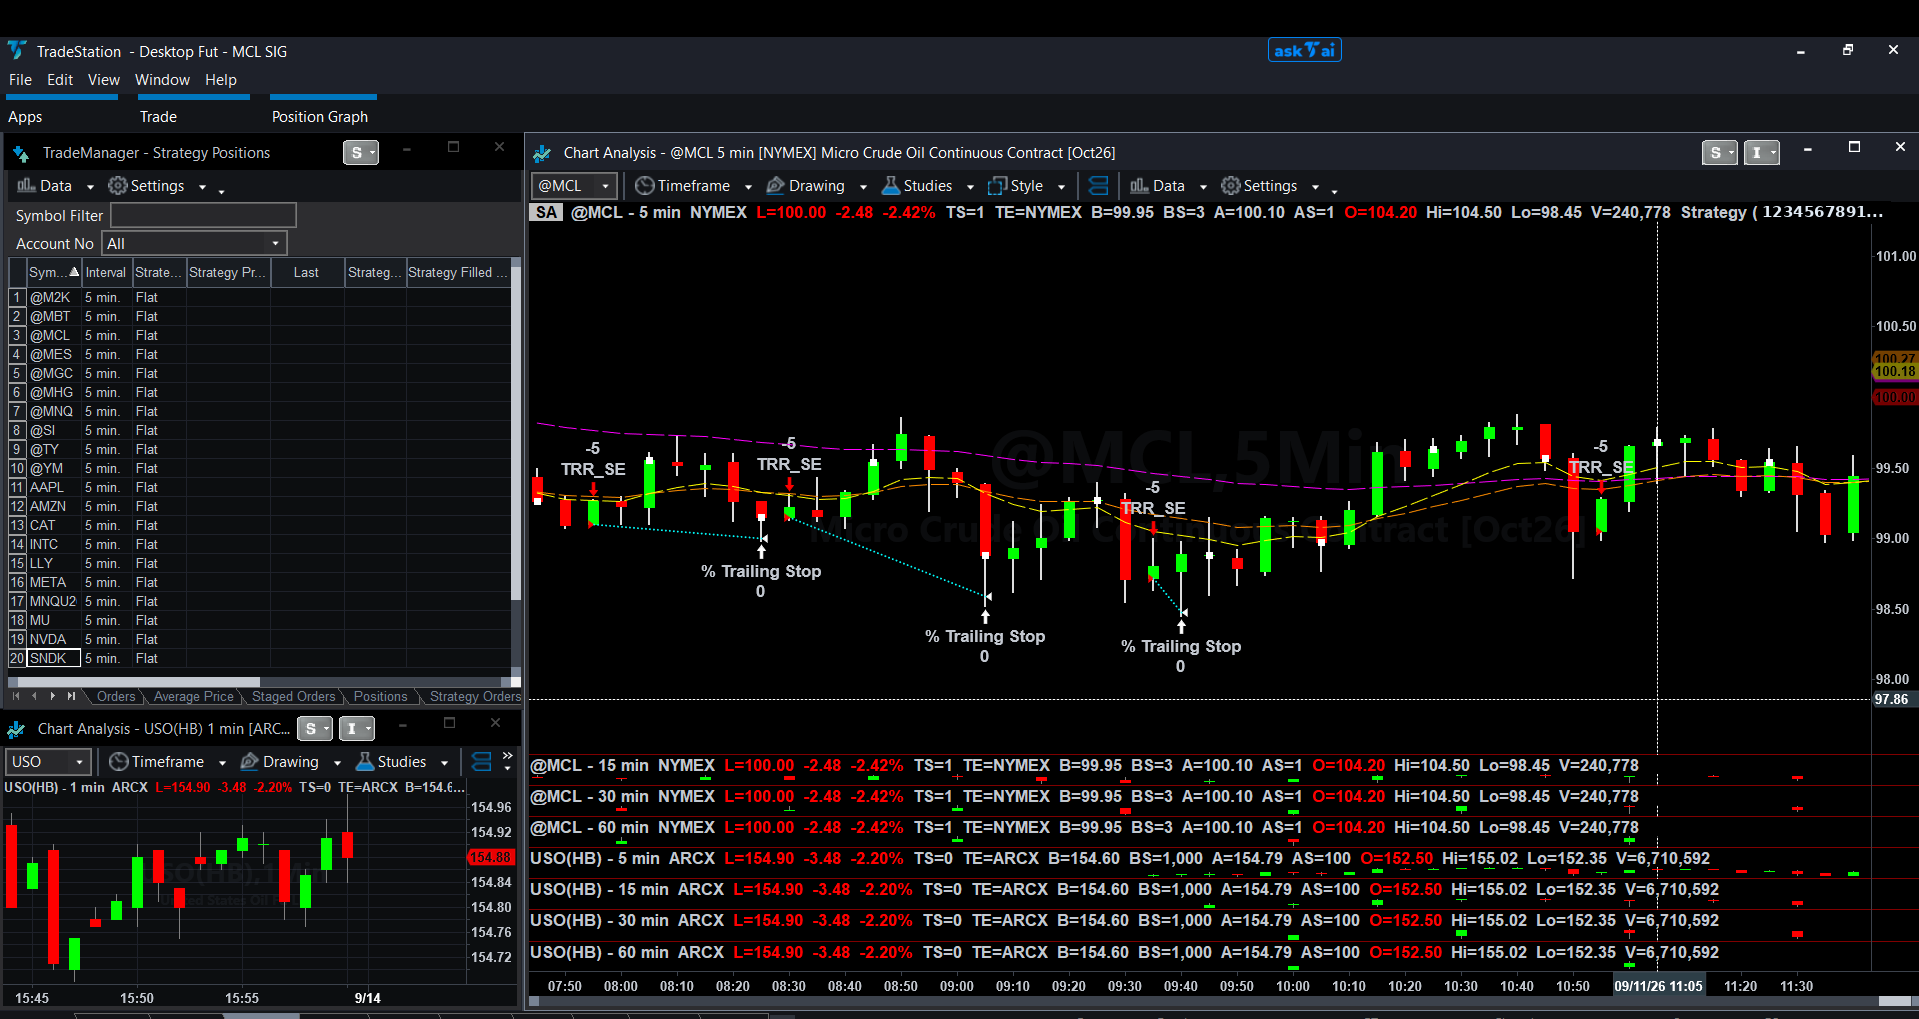
TradeStation loads the charts already configured for the Signal Engine. There is nothing to assemble — the layout arrives as it is meant to be used. The first load pulls several streams of history at once, so give it longer than a chart you build yourself. The list beneath the chart shows every stream the product uses, and all of them should populate.
Step 3 — Enter your license key
The engine checks your key before it marks anything. One key per workspace — enter it once and every chart in that workspace is covered. Copy the key from your confirmation email first; pasting is safer than typing fifteen digits.
-
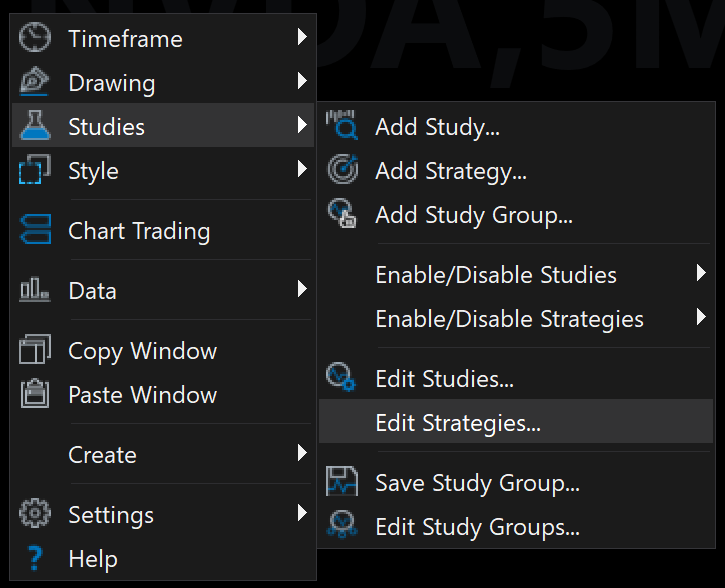
Right-click anywhere on the chart, then select Studies → Edit Strategies…
-
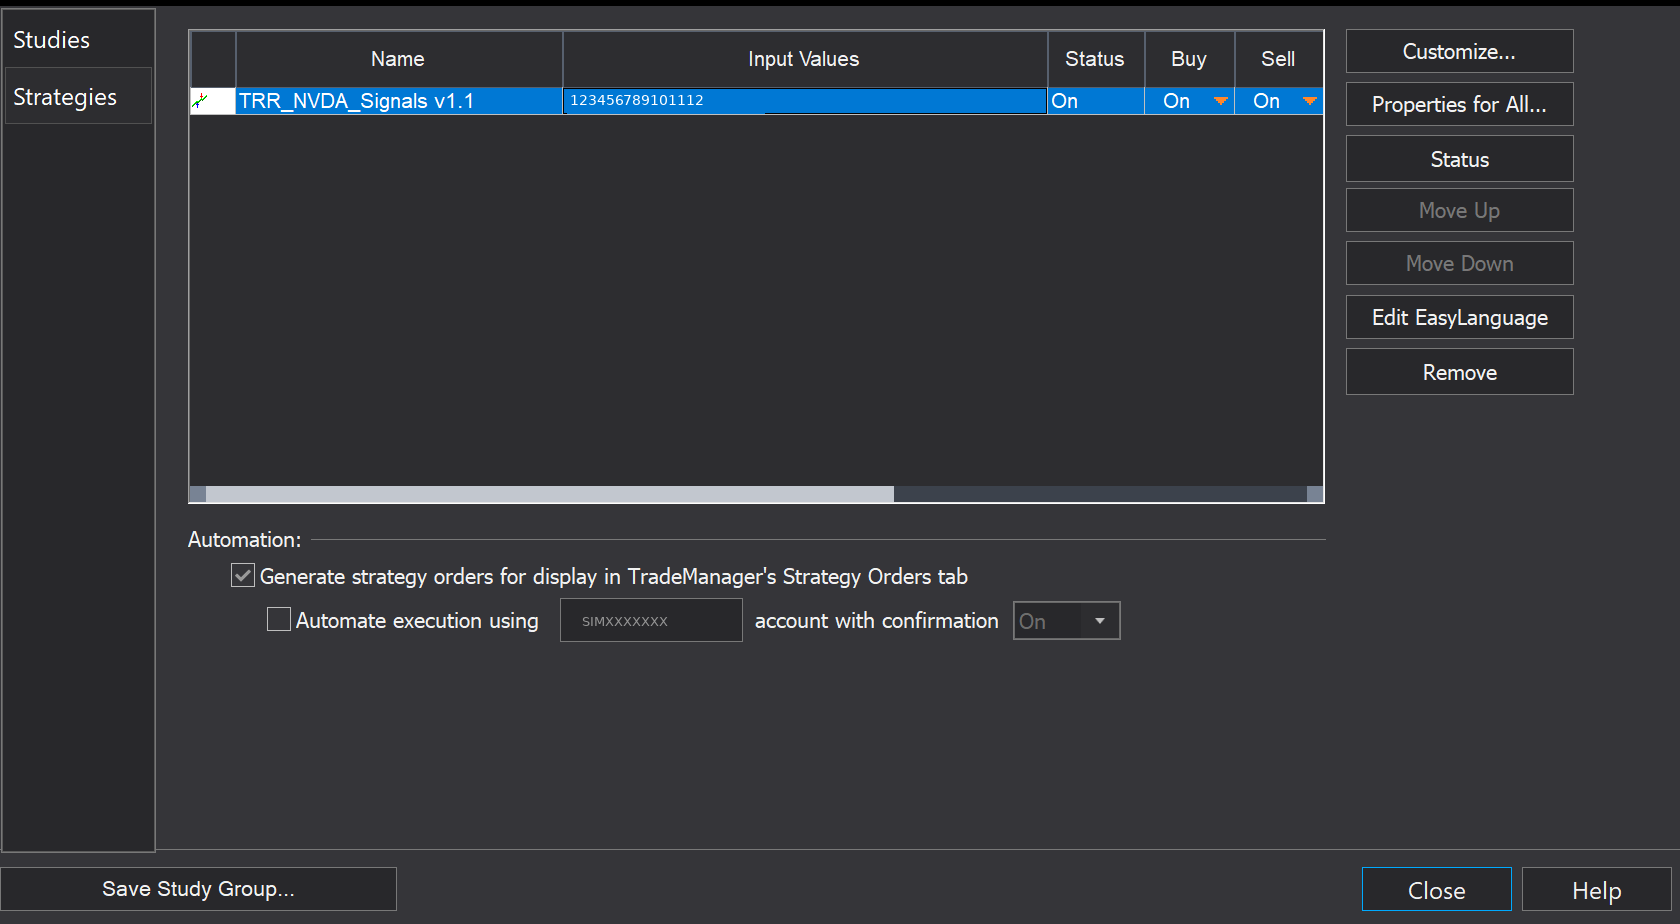
Select the True Range Research strategy in the list, then click Customize… The name carries your product. Leave the Automation settings at the bottom of that window as they are.
-
On the Inputs tab, select the value beside
LicenseKey, paste your key, and click OK. Then click Close and let the chart recalculate.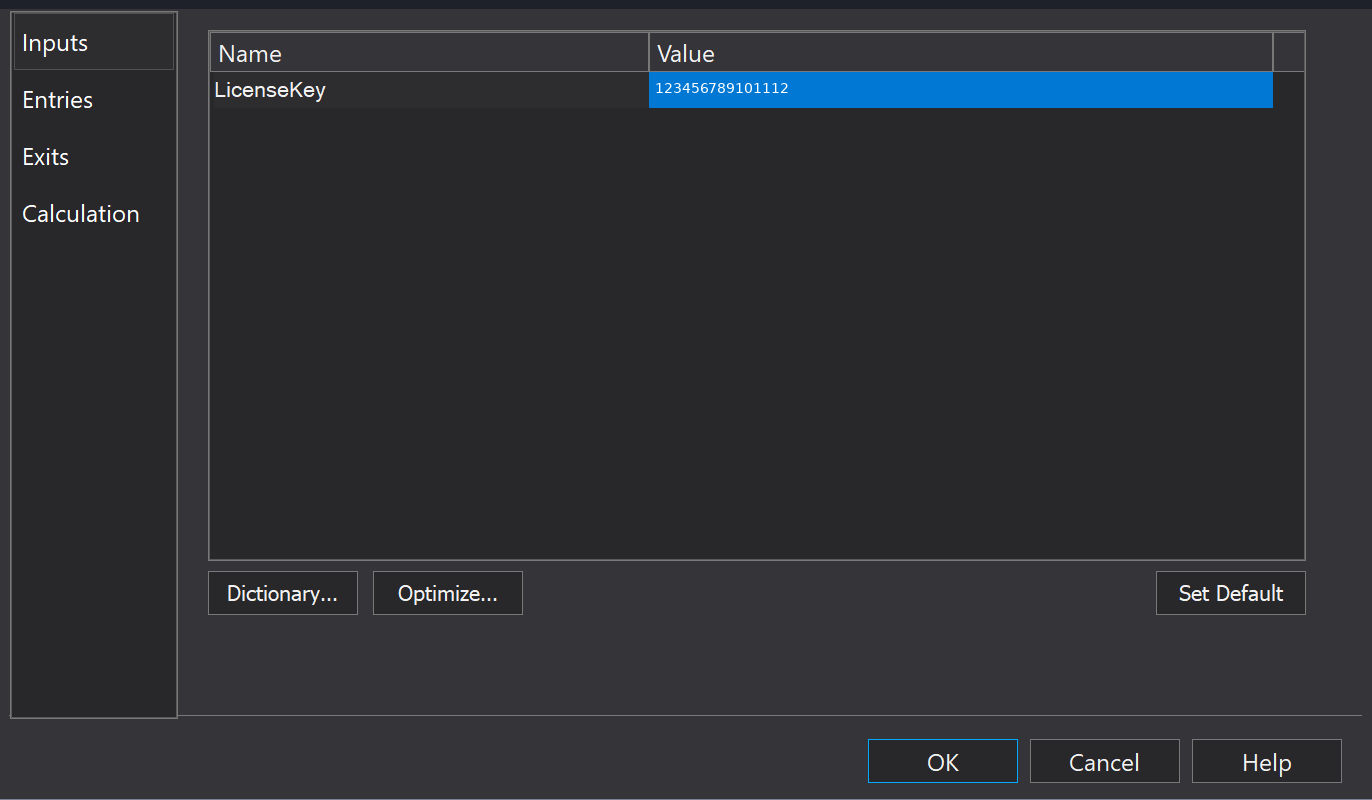
A stray space picked up while copying will fail the same way a wrong key does. Keys are issued per product, so a key for one symbol will not open another.
Step 4 — Save the workspace and the desktop
This is the step people skip, and it is why the setup sometimes disappears after a restart. TradeStation treats these as two separate things, and both need saving:
- File → Workspaces → Save Workspace
- File → Desktops → Save Desktop
Do both, and do them after the key is in. Saving only the workspace is the most common installation problem we see, and it presents as everything working perfectly until the next time you open the platform.
Verifying it worked
If the import and workspace load succeeded, the charts open and the suite begins reading price data. Setups are marked on the charts when the conditions it looks for are present. What you do with a marked setup is your own analysis and your own decision.
Note that this can mean seeing nothing for a while. Several conditions have to align before anything is marked, so an empty chart shortly after installation is normal behaviour rather than a failed install. If the workspace opened and the charts are populating with price data, the installation is fine.
If part of the chart populates and part of it does not, the missing side is almost always a missing account. Each product charts its symbol alongside a matching ETF, so a futures product needs both a futures account and an equity account, and an equity product needs an equity account.
If something goes wrong
Email support@truerangeresearch.com and include all four of these, which will usually save a round trip:
- Your name
- The email address on your subscription
- Your TradeStation version
- A screenshot of any error message